A few months back, I talked to Solicitor Mark Robinson about what to do if I endured an unscheduled dismount. You can read that article here.
When I asked Mark, “Should I fit a dash cam to my motorcycle?” his advice was a resounding Yes.
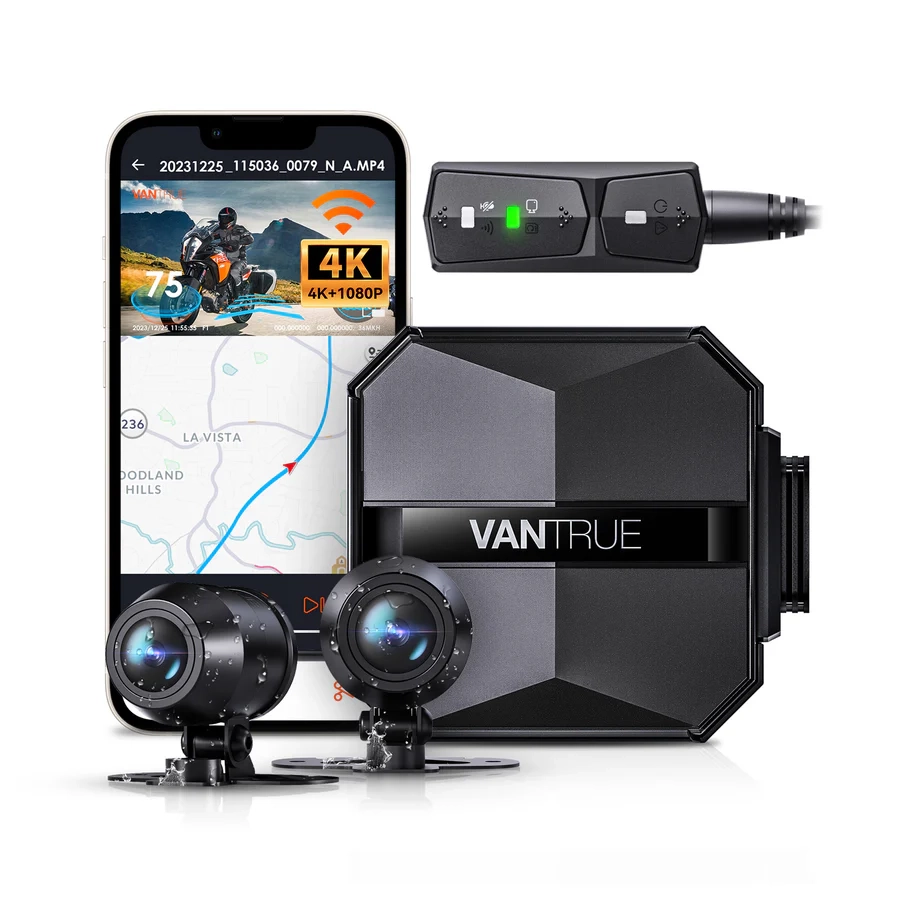
After hours on the internet trying to determine which is “best”—always a subjective term—I finally settled on the VanTrue F1 (Falcon 1). The deciding factor was VanTrue’s use of the Sony StarVis 8M Sensor, which gives the VanTrue excellent low-light and high-contrast performance.
All I needed now was a rainy day and a few hours in the garage.
Installing the VanTrue F1
Surprisingly, the hardest part of the installation turned out to be neatly running the cables. For some reason, I’d been thinking this would be a technically challenging job, but other than finding a switched live – more on that in a moment – there is nothing to it.
The rear light on many Hondas, including my NT1100, are secured by two bolts under the seat. Undo the nuts, and the rear light assembly pulls out. There is enough space around the light for the cable to run, but it is just the wrong side of tight. After the slightest filing down in the bottom left corner of the plastic surrounding the rear light, I had the perfect route for the rear camera cable.
The cable to the front camera was more time-consuming, thanks to the design of the NT1100’s “Tupperware”. Once stripped off the bike, routing the cable was about as simple as a simple thing.
The cables all have different connectors, so it is impossible to plug the wrong camera into the wrong lead in the control unit.
VanTrue F1 Dashcam
- Front Facing 4K Camera @ 30FPS
- 1080P Rear Facing Camera @ 30 FPS
- Augmented Reality Mode
- Sony StarVis 8M Sensor
- Wide Dynamic Range
- Built in 2.4Ghz/5.0Ghz WiFi
- Phone and Desktop Applications
- GPS and Speed Tracking
- IP67 Waterproof
Remote Control and Main Unit
With the cameras installed, the last two pieces of the puzzle are where to locate the main unit and the (wired) remote control.
The main unit lives in a “cage,” which also helps dissipate heat. This is a neat idea as you can remove it from the cage—it is a tight fit but designed to be done—if you ever want to swap out the memory card or relocate the unit.
This left just the remote control, which has several functions, including the GPS sensor.
To get the best GPS signal, the remote control needs to be mounted flat, facing up, and with clear sight of the sky. These are not absolutes; mine is on the plastic shroud between the tank and the forks. The better the location, the better the GPS reception, the better the sound recording, and the easier it is to operate if needed.
Power
I use a Heal Tech Thunder Box to power the bike’s accessories, which I’ve used in power-sensing mode until now. In this mode, when the Thunder Box senses the battery is being charged, it enables power to the accessories. Conversely, when the battery stops receiving a charge, the Thunder Box senses this and disconnects the power.
This setup has been perfect for my Garmin SatNav, but I don’t really want the engine running while I work through the options on the VanTrue F1 dashcam, so I’ve changed the Thunder Box to power the accessories when the ignition is on.
Honda kindly uses a switched live on the rear light, so one small Posi-Tap later, the Thunder Box, now powers my GPS and VanTrue F1 dashcam as soon as the ignition comes on.
In addition to making it easier to program and download video from the VanTrue control unit, having the option to keep the VanTrue running with the ignition on and the engine stopped has other advantages.
Should I need to record an exchange with another road user or an overzealous official who wishes to share their view of the world with me, I can do so unobtrusively. Stop the engine with the kill switch, and the VanTrue will stay recording.
VanTrue F1 Set Up
The list of options is long, but they all make sense, and it took me less than five minutes to go through them. There are options for video quality, although I’m not sure why you would select anything other than 4K 30FPS front and 1080P 30FPS rear.
You can also set the picture-in-picture options and the data you want shown on the video (location, speed, date, time, etc.).
There is even an option to invert the video image if either camera is installed upside down. Had I known this, I wouldn’t have loosened the screw and rotated the front camera. Either way works, but it demonstrates how VanTrue has thought about making the F1 dashcam easy to install and set up.
Wi-Fi
To set the options, connect your phone through the VanTrue app, which can be downloaded from Google Play or the Apple Store.
As soon as the VanTrue unit powers up, it starts broadcasting a Wi-Fi signal, which the app looks for. Once found, it automatically connects, and you can configure the options. This is also where you can playback and download video.
Considering how well thought out the installation process is and how simple the VanTrue F1 is to configure, I was slightly perplexed why downloading a video had so many steps. I expected it to be point and click, which it is, but it involves more pointing and clicking than I wanted.
Downloading Video
For completeness, I’ll start by saying that you need the VanTrue unit powered on, the app running on your phone, and to have connected to the unit using Wi-Fi.
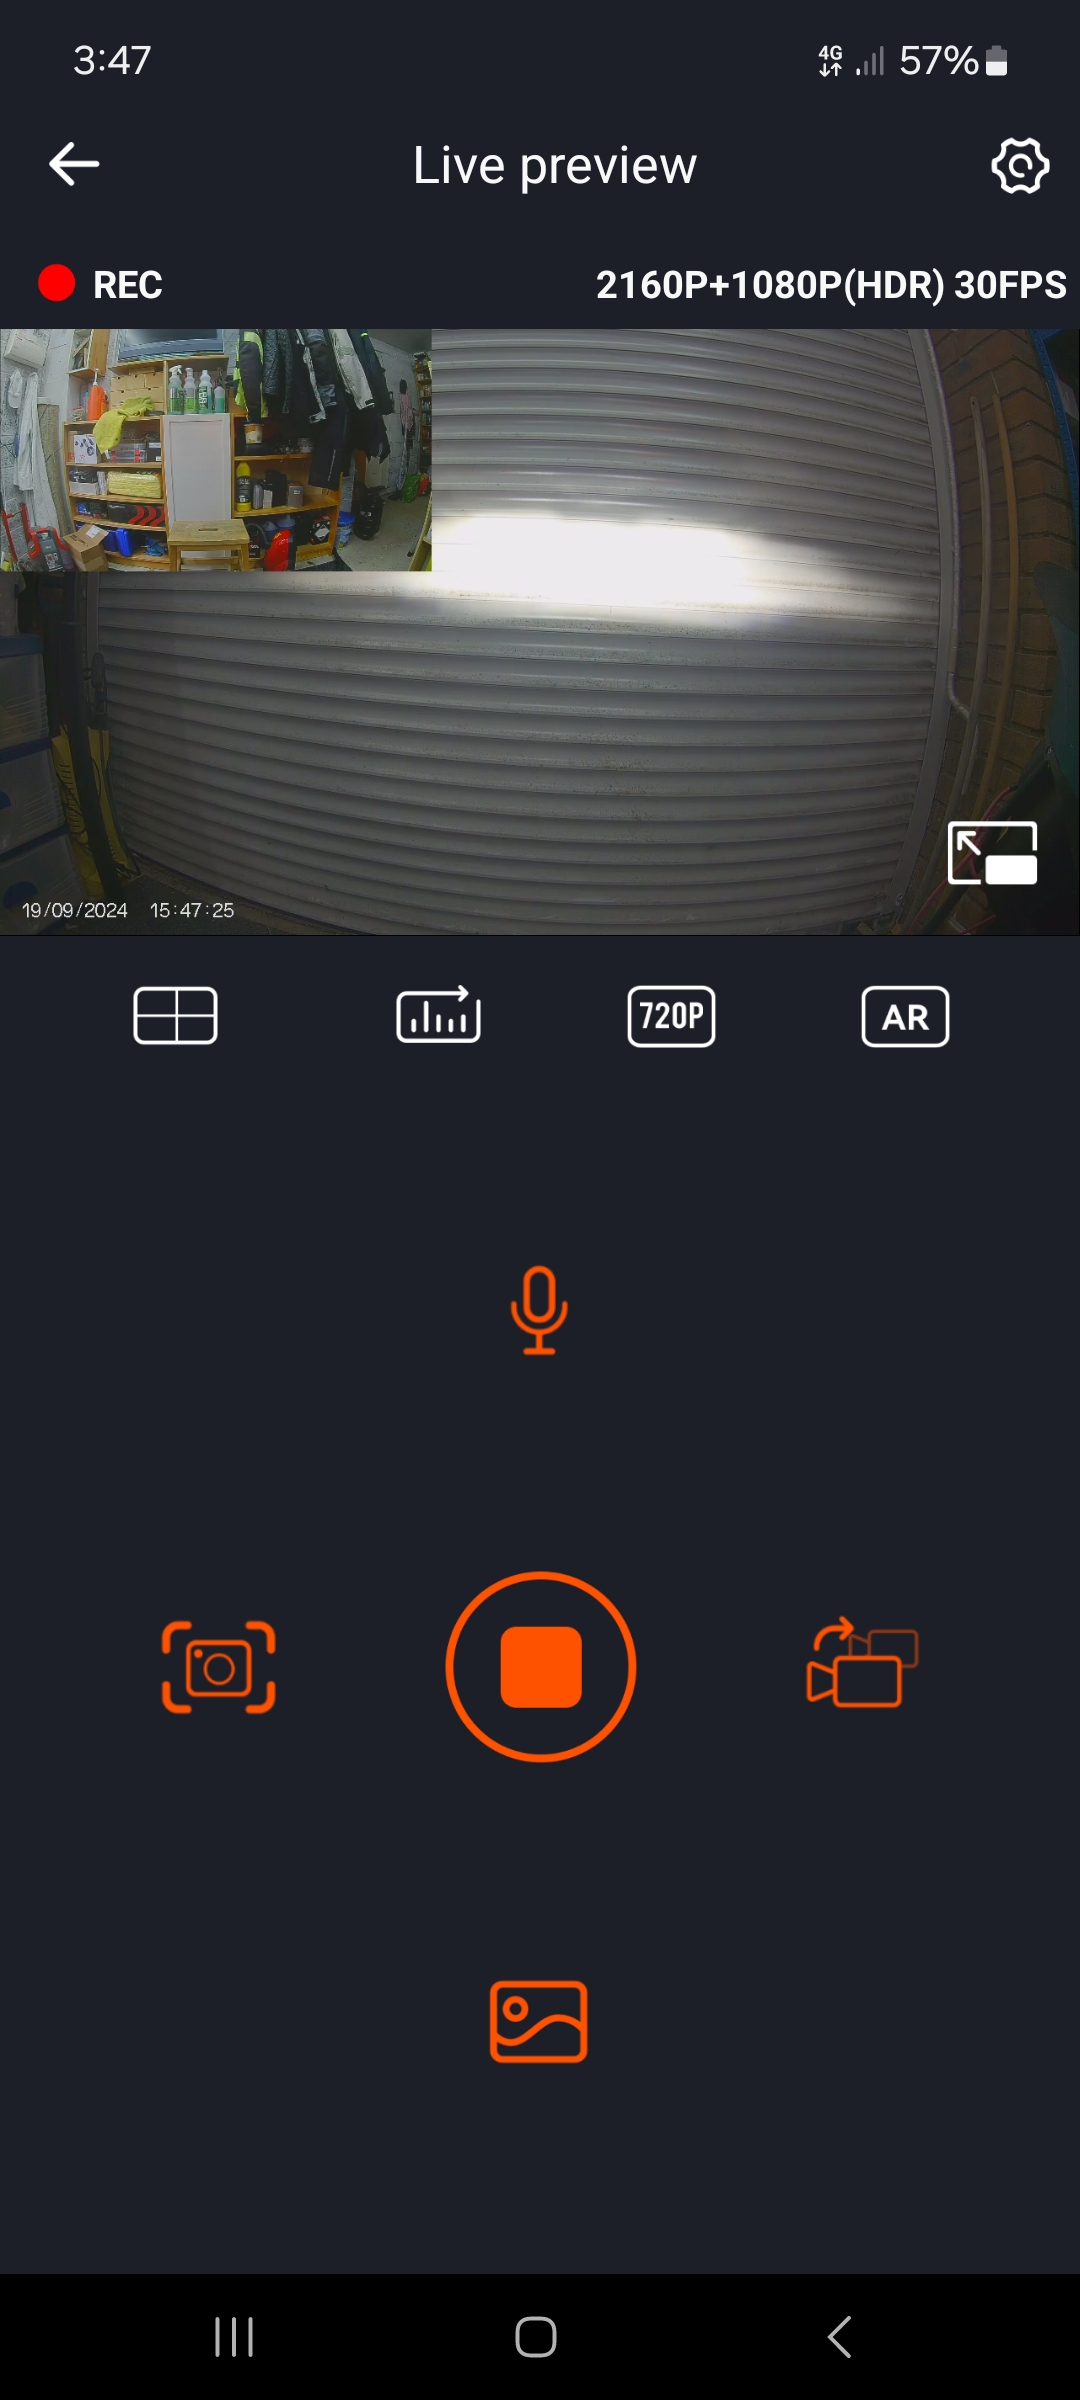
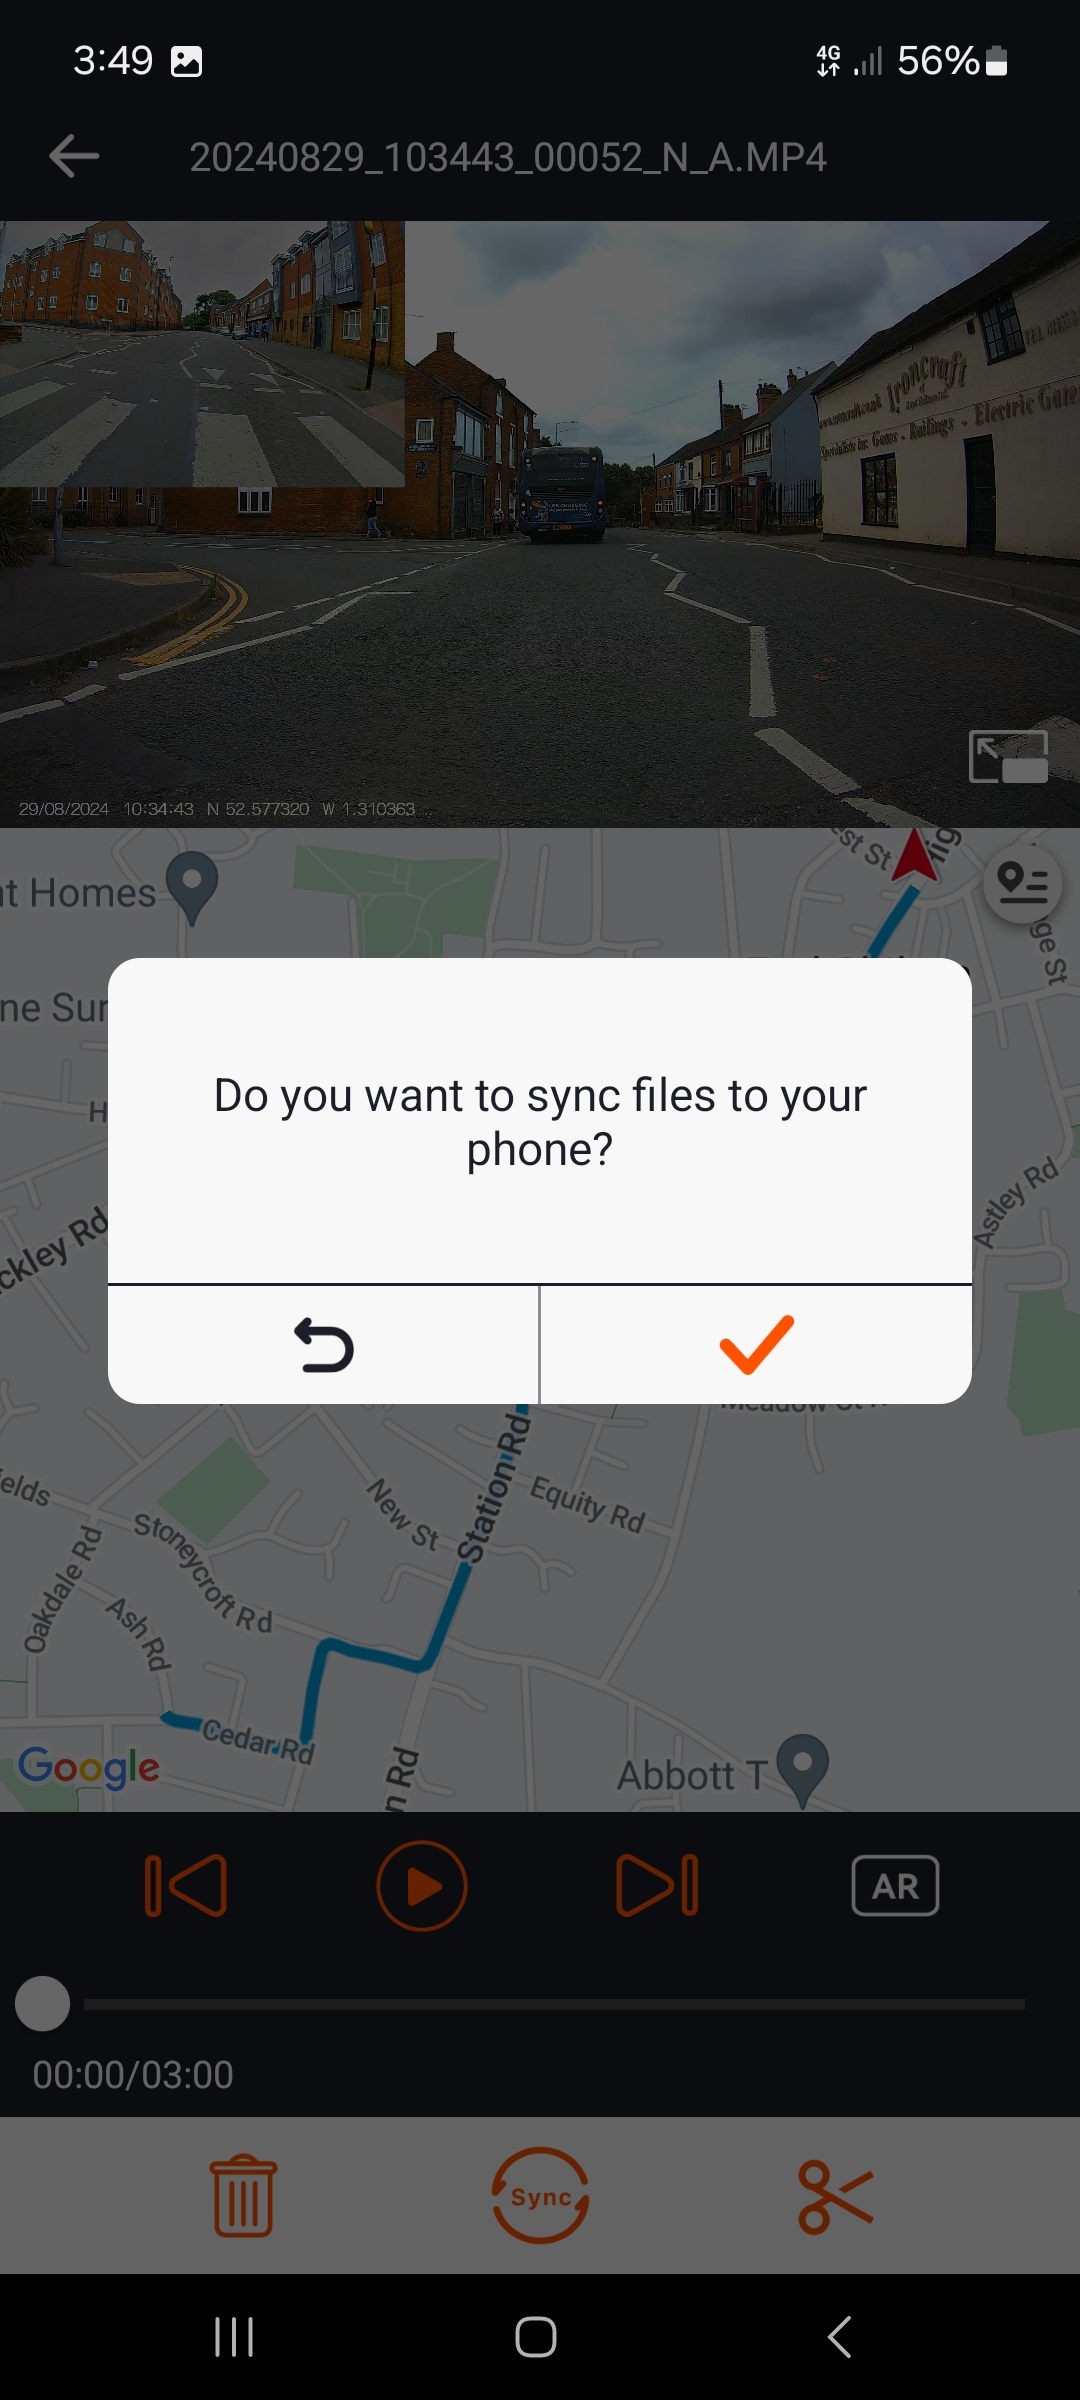
Select Live Preview and then the button at the bottom to open the gallery. Pick the file you would like to download.
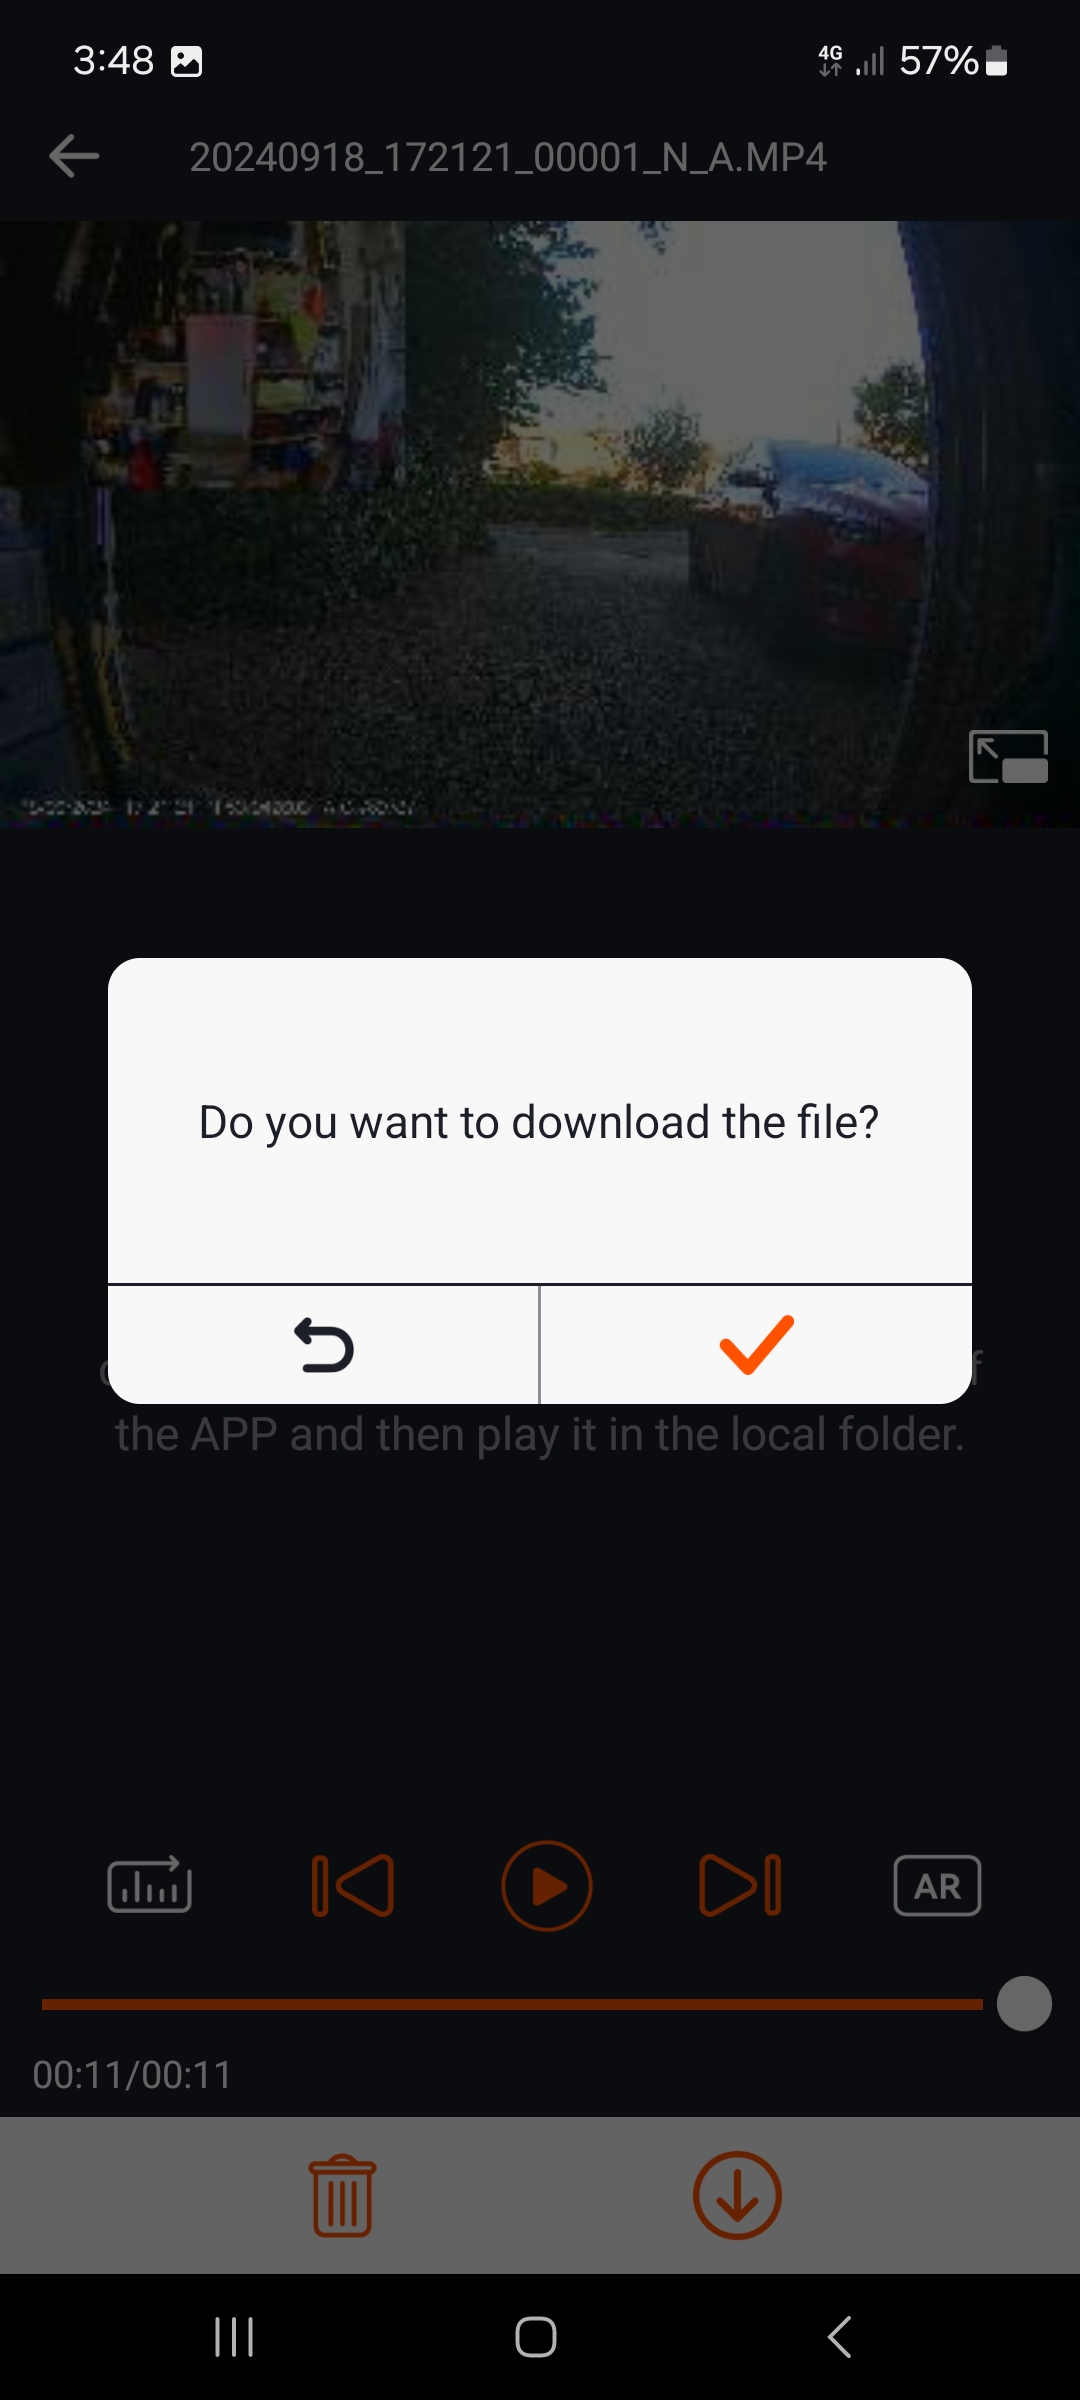
At this point, the video is still on the main VanTrue unit. Press the download button to copy the file to your phone.
Although the file is now on your phone, it is inside the VanTrue app. To copy the file, complete with GPS information, you must sync the file to your phone’s accessible storage. (press Sync)
Depending on your phone’s configuration, the video file should be in the DCIM folder under VanTrue.
Once transferred to your PC, you can play this file back on your PC using the VanTrue player.
The exported video files contain more than just images. The phone app and the PC player can overlay this information on your video. His is toggled on and off using the AR (augmented reality) button.
Loop Recording
Once configured, the VanTrue is pretty much “Fire and Forget”. When the ignition is on, the unit starts recording. The GPS receiver locks on to add location information to the video files, and sound recording starts. All of this happens automatically.
The video files are split into manageable blocks, the size of which you can configure. I chose three-minute files, making them relatively quick to download to my phone.
The other options are one or five minutes. All the files are timestamped, so if someone cuts across you, all you need to remember is the time if you want to review the video later or scroll through the files until you find the part of the journey you need.
I’m using a 32GB memory card, and when it is full, the VanTrue automatically overwrite the oldest file, so the recording is continuous.
Constant overwriting can eventually lead to issues with memory cards – this is true for all dashcams – so VanTrue recommends formatting the card every month. As with all the other features, formatting the card is very simple. The hard part is remembering to do it.
Memory Cards
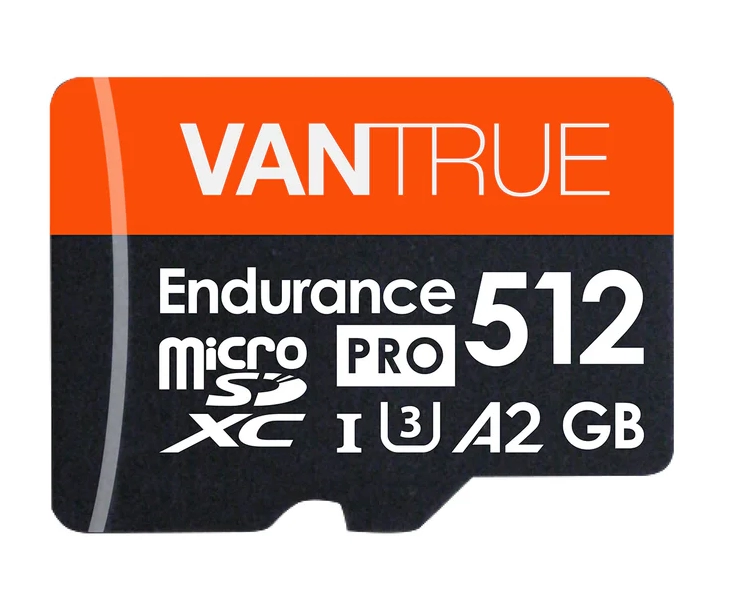
The VanTrue dash cam, as with most 4K video recording devices, requires a very high-quality micro USB card. Technically, you need a UHS Speed Class U3 A2 micro USB card, which is easier to type than it is to identify from the card’s packaging.
You are looking for a card with a U—for ultra—and a figure 3 inside the U. The A2 rating defines the number of read/write actions per second that the card is rated for.
The engineers refer to these as IOPS (Input Output Per Second), and an A2 card is rated at 2000 writes and 4000 reeds. A1 cards support less IOPS than A2 cards.
Fake cards are a huge problem for the memory card industry. Buying directly from the VanTrue or WesternDigital (SanDisk) websites reduces the chances of getting a fake card.
Events
Should something inappropriate happen and you want to keep a video file, a short press of the power button on the remote control unit will lock the file.
The same locking process happens if the VanTrue senses an “Event”. These files are then prevented from being overwritten until the card is formatted.
The F1 dashcam’s sensitivity to detecting an “Event” is controlled through the configuration menu. Initially, I went with very sensitive, and considering the condition of some of the UK roads, I was having several “Events” on every ride. After a few test runs, settings one or two worked well for me.
Why VanTrue?
When there are motorcycle dashcams for as little as £99 on Amazon, why buy the VanTrue F1?
If you have ever seen a photo or video where the sky is overexposed—typically, it looks bright white—or the alternative version where all you can see is a bright light, and everything else is dark, this is caused by the camera not adjusting for the different lighting conditions.
Correcting these problems requires different exposure settings. The first wide dynamic range techniques addressed these problems by taking two or more images of the same scene and merging them. This way, the bright sky and the darker areas of the image were correctly exposed.
Trying to do that with video images while the scene constantly changes requires a lot of processing power, so Digital Wide Dynamic Range was developed (no pun intended) to correct any issues as the video is captured.
Accepting that the VanTrue has a long list of functions and captures 4K video using a high-quality sensor (the Sony StarVis 8M video sensor) coupled with its wide dynamic range for enhanced video quality, especially at night, is why I chose the F1 over other motorcycle dashcams.
Show Me The Video
The F1 is easy to install and simple to configure, and it records high-quality video. It is all very interesting, but it is all meaningless until you see the video.
The sample footage below is on YouTube, which compresses the videos so you are not watching the original video from the VanTrue F1. Nonetheless, even after compression, the video quality if very good.
Bottom Line
A motorcycle dashcam is something I never wanted to need, but if I want to give myself the best chance of not being screwed over by insurance claims adjusters or be able to silence opinionated road users that are going to assume that I’m in the wrong just because I’m on a motorcycle, I need to stack the deck in my favour.
Any dashcam will help in those situations, but the better the image capture in all lighting conditions, the less I leave to chance.