
Floating
Although they look as if they are rigid, some parts of the braking system on a motorcycle “float”. Typically, it will be the front disks and the rear calliper that are designed this way. The movement is subtle but significant.
On the V-Strom, I‘d stripped the rear brake and cleaned it two or three times in an effort to make it work more effectively. What I’d missed was that one of the retaining bolts went through a sleeve on which the rear calliper should float.
Because the calliper wasn’t floating, the pads were not making full contact, so my braking efficiency was reduced. I really should have worked all of this out the first time I took it apart, as the pads were not evenly worn.
The floating sleeve had seized due to the reaction between the two metal types. The steel sleeve had reacted with whatever the calliper body was cast from. Add a little road salt mixed with rainwater from a couple of years of winter riding as a catalyst, and the calliper was fixed in position.
Once I’d removed the sleeve, which wasn’t the easiest of jobs, cleaned up the white furry corrosion and greased everything before reassembling, the rear brake was once again contributing to my ability to stop when I wanted to.
Bobbins
On the front brakes, it is typically the disk that floats, especially if you have radially mounted callipers – the ones where the calliper bolts are in line with the wheel rather than running across the bike in line with the axle.
 The round bobbins hold the disk in place but allow that all-important float.
Thankfully, it is easy to check that these haven’t seized. All you need is a 10mm bolt about 3cms long, two large washers, and a 10mm nut.
Put the bolt through the bobbin with a washer on either side and tighten the nut sufficiently to grab the bobbin. When you turn the bolt head, the bobbin should rotate and feel smooth.
If it turns but doesn’t feel smooth, some WD40 or Bulldog BDX is your friend. A few squirts and work the bolt head in both directions until it smooths out. Repeat the process for all the bobbins.
As you may have just sprayed lubricating oil on your brake disks, you will need to clean them with warm soapy water, and for that finishing touch, perhaps a light rub down with a scouring pad to ensure the brake disk surfaces are clean.
KTM Pins
Having checked the bobbins on the KTM, I could still feel a mild pulsing when coming to a stop. The brakes were undoubtedly effective at speed, but most likely, the pressure I was applying was masking whatever was causing the issue.
The KTM dealer kindly suggested new disk rotas at an eye-watering four hundred and something British pounds, but with no real evidence that they were out of specification, throwing that kind of money at the problem didn’t feel right.
So, I opted to start by replacing the more cost-optimised (cheaper) bits first and work my way up to replacing the rotas.
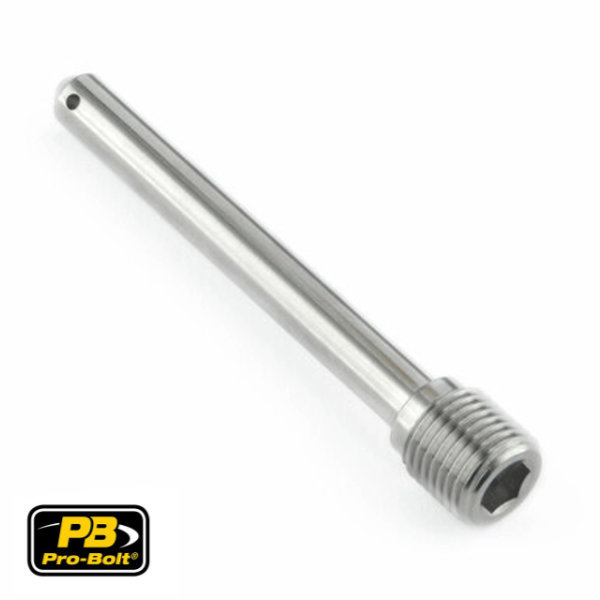 My first call was to Pro-Bolt to order some of their fancy Titanium Brake Calliper Pad Pins. They sound expensive at £12 each but compared to the KTM original parts at £9.50 each, it isn’t that much of a cost increase.
The significant advantage, though, is that the Pro-Bolt brake pins are made from titanium, which is totally resistant to salt water in its pure form. Titanium will tarnish but is much easier to clean due to it not corroding.
The same could not be said for the original KTM brake pad pins. I’d had them out for cleaning a few times and removed as much of the old copper slip, road grime, and corrosion build-up as I reasonably could before re-installing the pins.
Putting them side by side with the Pro-bolt titanium pins, my efforts to remove the surface corrosion from the old pins hadn’t been vigorous enough. In my defence, short of taking a grinder to the pins – which is not a good idea – I couldn’t have done much more to remove the corrosion.
Changing the brake pad pins was worth every penny. The low-speed pulsing was gone now that the pads could move freely on the pins. It was a simple 10-minute upgrade and less than 10% of the cost for new rotas, which I didn’t need anyway.
Paranoid
Having written this, my paranoia kicked off, and I’ve just checked the callipers and bobbins on the Tracer and the Multistrada. The rear calliper on both bikes has just the right amount of play, and the bobbins move freely.
As the Tracer has been sitting in the naughty corner of the garage for the past ten weeks – not that it is misbehaving, I decided to ride the Multistrada through winter – I’m sure I’ll check them again before that first ride in the warmer weather.
We take a lot of care when storing our motorcycles for the dark and damp months. We clean away the road grime, cover them in protective fluids, plug them into battery optimisers and make sure the tyres are on old chunks of carpet rather than the concrete floor of the garage.
I should start thinking about the things to check on the Tracer when I reverse the process and release the Tracer from the naughty corner of the garage.
The warmer days are coming. Honest.
Clarity
The header image for this article is based on an original work by Sebastian Huisman and is used here under license.